
Expanding a VDI Disk Size on Xen
It was one of those Patch Tuesdays. A controle plane VM was running low on disk. Obviously, one can’t resize root disk of the VM that’s hosting the control plane using that same control plane.
On Xen hypervisor, resizing a disk means resizing a Virtual Disk Image (VDI). The toolstack is the same across both: you can do so from a control plane like Xen Orchestra, but also directly from the host over SSH using the xe CLI, straightforward in principle, but with a few traps to navigate, especially when you have disaster recovery replicas in the mix.
Step 1: Identify the Right Storage Repository (SR)
The first instinct might be to just search for the VDI by name. Resist that. If you’re running disaster recovery with Xen Orchestra, your VMs are likely replicated to other hosts and SRs. That replication creates VDIs with identical names across multiple SRs. Without filtering, you’ll end up staring at a list of look-alike UUIDs with no reliable way to tell production from backup.
Start by listing SRs to pin down the one hosting your production VM:
$ xe sr-list

                uuid ( RO): d0841b5e-b5cd-a30d-fdca-85f21810c225
          name-label ( RW): xen_sr1
    name-description ( RW): SR on host1 nvme1
                host ( RO): <shared>
                type ( RO): nfs
        content-type ( RO): user
Note the uuid of the SR you want to target.
Step 2: Find the Right VDI, Filtering Out Snapshots
With the SR UUID in hand, look up the VDI by name, and critically, filter out snapshots using is-a-snapshot=false. This avoids accidentally resizing a snapshot, which would either fail or produce unexpected results.
Note: XCP-ng supports shell tab-completion for
xecommands. If you’re unsure of the exactname-label, just start typing and press Tab.
$ xe vdi-list name-label=your-vm-disk-name is-a-snapshot=false sr-uuid=d0841b5e-b5cd-a30d-fdca-85f21810c225

                uuid ( RO): b64b7c81-58ee-4316-a87a-b8a6c967d0be
          name-label ( RW): your-vm-disk-name
    name-description ( RW):
             sr-uuid ( RO): d0841b5e-b5cd-a30d-fdca-85f21810c225
        virtual-size ( RO): 26843545600
            sharable ( RO): false
           read-only ( RO): false
The virtual-size field shows the current size in bytes: 26843545600 is 25 GiB. Note the VDI uuid for the next step.
Step 3: Resize the VDI
Use xe vdi-resize and provide the target size in bytes. For 32 GiB, that’s 34359738368.
$ xe vdi-resize uuid=b64b7c81-58ee-4316-a87a-b8a6c967d0be disk-size=34359738368
The command returns silently on success. That’s it for the hypervisor side.
Quick byte reference:
- 20 GiB →
21474836480- 32 GiB →
34359738368- 64 GiB →
68719476736
Step 4: Let CloudInit Handle the Filesystem Resize
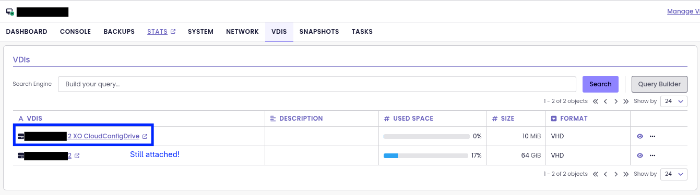
If your VM was provisioned from a cloud image, it almost certainly includes CloudInit. And as long as the CloudInit disk is still attached to the VM, you don’t need to manually resize the filesystem, LVM volume groups, or partitions inside the guest.
Simply reboot the VM. On next boot, CloudInit will detect the expanded block device and automatically grow the partition, the LVM physical volume, the volume group, and the filesystem to fill the new space.
# Inside the guest, after reboot - verify the new size
$ df -h /
Filesystem      Size  Used Avail Use% Mounted on
/dev/root        30G   22G  8.5G  72% /
If CloudInit is no longer attached or was never part of the setup, you’ll need to handle the in-guest resize manually using tools like growpart, pvresize, and lvextend - but that’s a separate topic for another post.
This whole process takes under two minutes once you know which UUIDs to target. The SR filtering step is the one most people skip the first time, and then spend twenty minutes wondering why they have six VDIs with the same name.